
fenix
Acquiring and Setting up the GLAabit USB 3.0 Gigabit LAN Driver In today’s contemporary digital age, a steady and swift internet connection is critical for numerous tasks, from online gaming and video streaming to cloud computing and large file transfers. For users who demand a trustworthy and high-velocity internet connection, a Gigabit LAN (Local Area Network) adapter is a vital peripheral. One such gadget is the GLAabit USB 3.0 Gigabit LAN adapter, which provides a handy and effective way to improve your computer’s networking capabilities. However, to get the most out of this unit, you require to install the right driver. In this piece, we will guide you through the procedure of downloading and installing the GLAabit USB 3.0 Gigabit LAN driver. What is the GLAabit USB 3.0 Gigabit LAN Adapter? The GLAabit USB 3.0 Gigabit LAN adapter is a compact and mobile device that enables you to add Gigabit Ethernet connectivity to your computer via a USB 3.0 port. This adapter is designed to deliver a speedy and reliable internet connection, making it suitable for users who want high-speed networking for web applications. Why Do You Want a Driver?
Troubleshooting Common Difficulties In case one face any problems throughout this transfer or perhaps installation process, listed here will be several common troubles along with the solutions: glaabit usb 3.0 gigabit lan driver download
Troubleshooting Common Difficulties If one face some problems during the download or installation process, listed here stand some common troubles and their solutions: Acquiring and Setting up the GLAabit USB 3
Launch the Installer: Run that downloaded driver file as well as adhere to those on-screen directions. Plug in this Adapter: Attach the GLAabit USB 3.0 Gigabit LAN adapter towards one available USB 3.0 port upon one's computer. Complete that Installation: Finish the installation operation through obeying those prompts. However, to get the most out of this
click to close
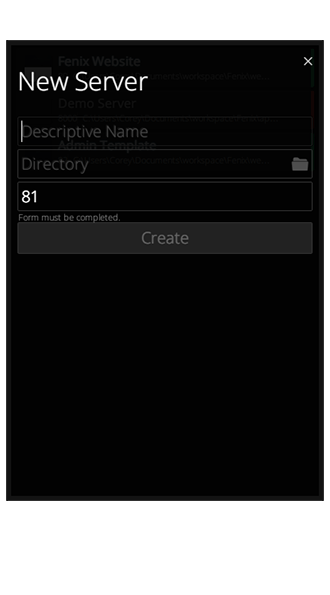
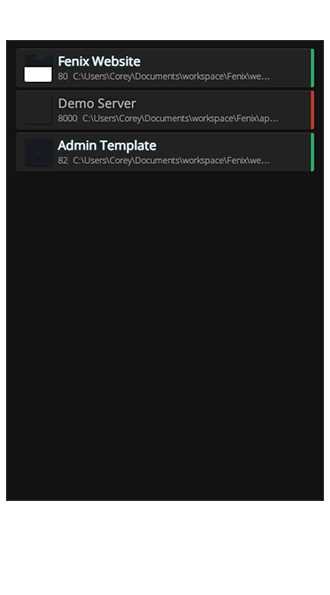
Track sites by meaningful names.
Let Fenix find an available port for each server or specify your own.
Capture a preview screenshot.
Updated automatically.
Server status at a glance.
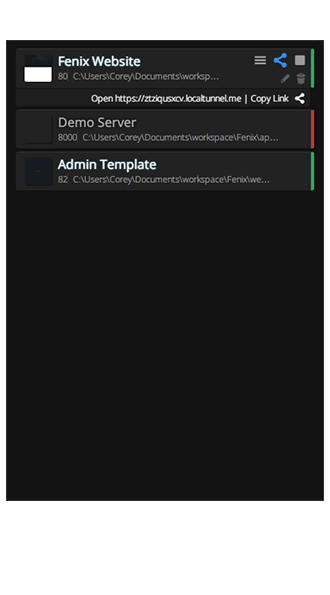
Receive a public URL to share with collaborators.
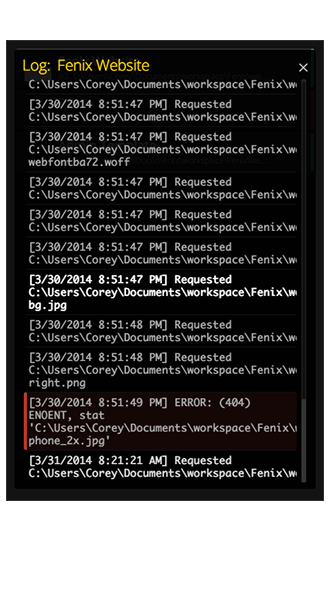
Easily scan logs with subtle and effective highlighting.
Errors and warnings are color coded.
Manage evereything through a simple GUI.
don’t forget to register!
click to close
View requests as they arrive.
JSON & XML request bodies are color coded with line numbers.
Inspect HTTP headers as they're proxied to the request browser.
Examine the actual data your apps use.
npm install -g fenix-cli
fenix list
SERVERS:

Fenix Website [on]
  - C:\Users\Me\Documents\sites\Fenix
  - http://127.0.0.1:80
Demo Server [off]
  - C:\Users\Me\Documents\sites\demo
  - http://127.0.0.1:8000
Always buried in the console? No problem.
Requires node.js